I wanted to try Github actions since it got announced. Finally I had it on my foreseeable list when I started this blog, and lately, I did it. 👏 🎉🎆 I got to a working pipeline in 25 tries, lets go through each step how it improved piece by piece.
I started to work on it at night, thinking it would not take long. (hehe, famous last words). After around 20 failed runs, I went to sleep. As soon as I got into vertical, I had the moment of clarity what a noob tunnel vision I had. The next morning I fixed it in the remaining 5 attempts where I added new steps and fixed typos, so not major fuckups like in the previous twenty. Take away again: don’t force it, rest well.
History
First, we need to know why we are starting from where. If you are interested only in github actions dos and donts, you can skip this history paragraph. When I first set up the GitHub pages with hugo I wanted to keep it simple, I followed the recommendation in the guide on the gohugo page. This means a simple manual deployment, the public (build output) folder is set up as a git submodule and the submodule is pushed directly to the GH pages repo. Easy,
- write the post or make modifications
- update config with secrets
hugo#builds the sitecd public && git commit[...] && git push#updating GH pagecd .. && git commit[...] && git push#updating sources and save the reference to GH pages
I even had a small sh script doing this, was far enough.
The plan
Moving to Github actions I wanted to replicate the same steps. I saw some prepared Github actions in the marketplace, also found complete workflow in my used theme’s repository. As we will see, the problem is that none of the already existing actions are for the same setup that I have. For example, GH page can be a separate repo or branch.
Create the workflow
Github actions calls the pipeline as workflow, the file where you define it goes to the folder .github/workflows as a something.yml file. I created it right on the web, it has nice UI, with the marketplace of the actions on the side. But you need to copy the snippet from the marketplace to your file, as it can be put into a lot of places and with a lot of variations regarding configuration.
The simple starter template is useful, helpful to see the basic properties you should work with, but some of what I needed later was missing. Yep, you could say RTFM, I am not whining just telling my exact case.
The example has the actions/checkout@v2 as the first step, then some no brainer sh script and that’s it. The gohugo workflows I saw and most of the workflows at all starts with the checkout not a big surprise. This action gets the current repo into the pipeline machine to work with. This is a crucial part, details below.
I replaced the rest with the hugo related steps. The web editor was not nice to me, I was not able to scroll to the end of the file, maybe it is a Linux/Firefox issue. So I Ctrl+A, Ctlrl+C it to a text editor, added the changes, copied it back to the web editor. The preview tab worked fine.
The example had the
    # Allows you to run this workflow manually from the Actions tab
    workflow_dispatch:
lines what was perfect, I wanted to run it manually to test the steps.
So I did, and it failed. Would have been a surprise if not.
Feedback for Github too, but mainly info for you to keep an eye on. The view workflow page on Github is not refreshing automatically. So when you click start workflow you need to refresh the page to see the newly started run. I was tricked at least once and clicked start multiple times making the workflow run in parallel with itself.
Debug
It is quite easy while quite hidden at the same time, to get some more information out of your workflow runs, here you see how to enable debug logs
actions/checkout@v2
This is basically the center of everything. Does things in the background what is really nice to do simple stuff easily, but makes it tricky if you leave the main path. Yes, again RTFM.
If you give no extra properties it will clone the repo the workflow is running from and sets up a secret GITHUB_TOKEN for the same repo. This is a protected secret name, you won’t be able to create a secret with this name. It is used automatically by this action.
If you need to work with multiple repositories in a workflow the token above won’t work as that is only for the current repo. You will need to create a Personal Access Token and tell the action to use this not the default one by
with:
    token: ${{ secrets.YOUR_PAT_SECRETNAME }}
providing it in the with field’s token property.
In the with you have a lot of other things you can specify like a different repo, ssh, submodule, etc.
Since it is Github, I thought the git operations will be the easiest thing in the whole pipeline, but until I figured out the GITHUB_TOKEN behavior and changed it to PAT, it was a bit of a struggling. It felt like it can work only with one repo and blocked the possibility of pulling or pushing the submodule changes.
Configure git
(At least these errors are visible in the normal output and straight forward)
Out of the box the git you get, gonna git get boom boom pow is not configured at all, it will fail as no author, name, email is given.
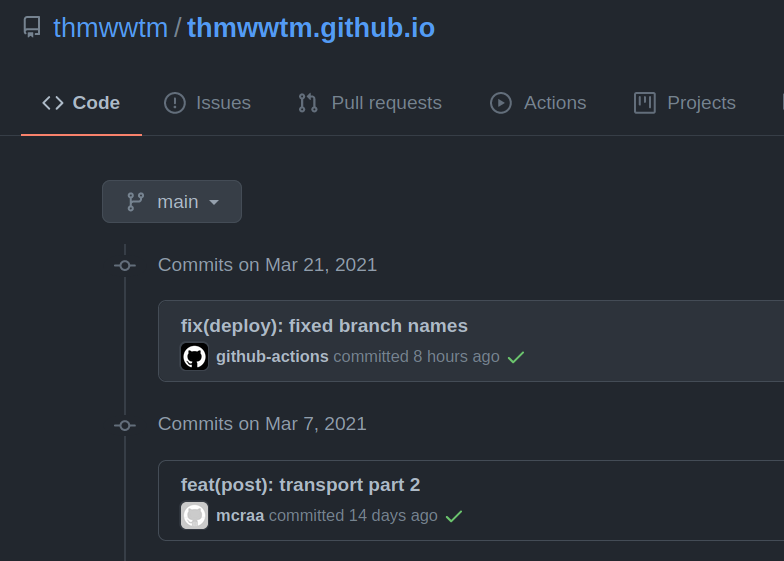
git config --global user.name github-actions[bot]
git config --global user.email 41898282+github-actions[bot]@users.noreply.github.com
You want to add these lines into your script before commit to make it pass, and also to have the github-action name and icon next to the commit in the history.
Pulling a repo could also fail with no merge preference is configured. I added —ff-only at the end of git pull, but it can be set up in git config too.
Detour of git actions
Most of the existing actions use the GITHUB_TOKEN so searching for a “git push action” and finding out that won’t work for the same reasons was strengthening my incorrect perception of how git commands work here. I tried ad-m/git-push-action, turned out it is just not for what I want. I had a look into peaceiris/actions-gh-pages@v3, just won’t work for me either.
Moment of clarity
Still a bit lead by the idea of one job one repo, I decided to separate the one job example into multiple jobs. Actually, without the wrong cause, it is the right way to do it, and how I did pipelines before. 🤦
- build and separate the output
- take the output and put it where it will run
Having the publish step as just a git push was maybe a bit deceiving too.
Artifacts
For that, there are two friends actions/upload-artifact and actions/download-artifact. In one job you store your build output with upload, then you get the same thing with download in a later job.
The upload will make the artifacts available to check on the web interface until its retention period ends and gets deleted.
Needy boi
To chain jobs together you specify the needs property with the name of the job you want to run before this one. If it is not set your artifacts may not be ready to download after the upload when the job is started.
 vs
vs
Why did it fail few more times
As originally the public folder was set up as a submodule, it contained a .git folder. So without preparation, up-, then downloading the artifacts contained the .git folder, and the target where I wanted to put it had one too, of course github actions don’t want to override that, so I added an extra step, preparing the artifact before upload, I removed the .git folder, uploading only the good stuff.
In this preparation step, I also copy the last commit message to a file, so when downloading the build output and committing to the other repo, I can add the same commit message there.
First I named the upload publish and pointed to the public folder, then at the download I gave the name “publish” to download. It failed as could not find it. I searched a bit and found multiple issues in the actions repo regarding naming, the common solution was, give name and path the same string value and it will work.
Another solution was in another thread, to change to actions/upload-artifact@v1 from @v2, I did both, and it is working. May need further investigation what was the real issue.
You see above how to access secrets. You can pass them as parameters or env vars into your step.
- name: suchstep
    with:
        myinput: ${{ secrets.VERY_SECRET }}
    env:
        myvar: ${{ secrets.MUCH_CONFIDENTAL }}
And get them with dollar and curly braces, AND as a property of the secrets object. Once I forgot to add the secrets prefix, could happen to anyone 🙄
Greed
It seemed I figured out everything, got greedy, and added one more step, to update the source repo’s submodule with the published commit. I had to fabricate a commit message, and I used the wrong type of quotes, single instead of double. Worked well with echo but not outside that, sloppy test.
It reached the last step, failed, I fixed, run again, and it fails one step earlier. Why? Because the middle job is a commit and push, and as it was working before, now we have nothing to commit, working tree clean, and this is taken as a non-zero return value. 😠
I had to add temporarily a continue-on-error: true to this job, or useless change to the repo, in order to test out the last step too.
Summary
![]()
Get the badge for your workflow:
![]()
It took me 4-6 hours maybe to go from zero to a quite satisfying pipeline, with two repositories working together. Maybe there is an emulator or simulator already, or other ways to debug a workflow, please lighten me up if you know, I did no research on that, however, this trial and error way of progress is not the most efficient I guess. Running it is not that time-consuming takes around 10 seconds in this case. The time between runs (khm.., RTFM) is longer.
At the end the workflow is:
- when there is a push or PR updating the content folder run (manual start still available)
- checkout the source repo
- update submodules (theme and public folder)
- setup gohugo on the runner
- generate the output with hugo (build)
- prepare artifacts (remove .git from public folder, save commit msg to file)
- upload artifacts
- checkout the GH pages repo (public submodule in source repo)
- download the artifacts (will overwrite files here)
- commit and push to the GH pages repo
- checkout the source repo again
- go to the public folder
- pull the updated GH page repo
- go to the root folder
- commit and push the updated submodule reference to the source repo
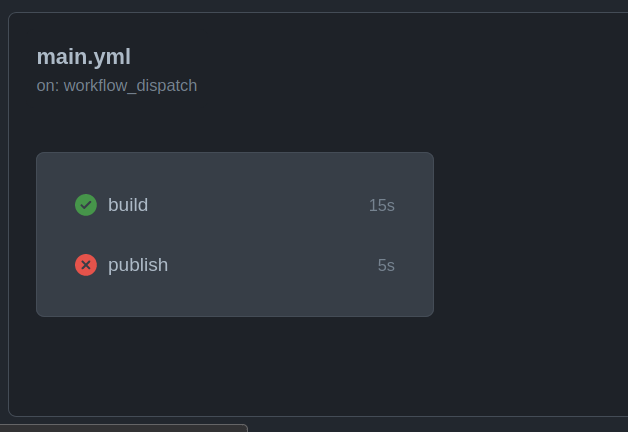
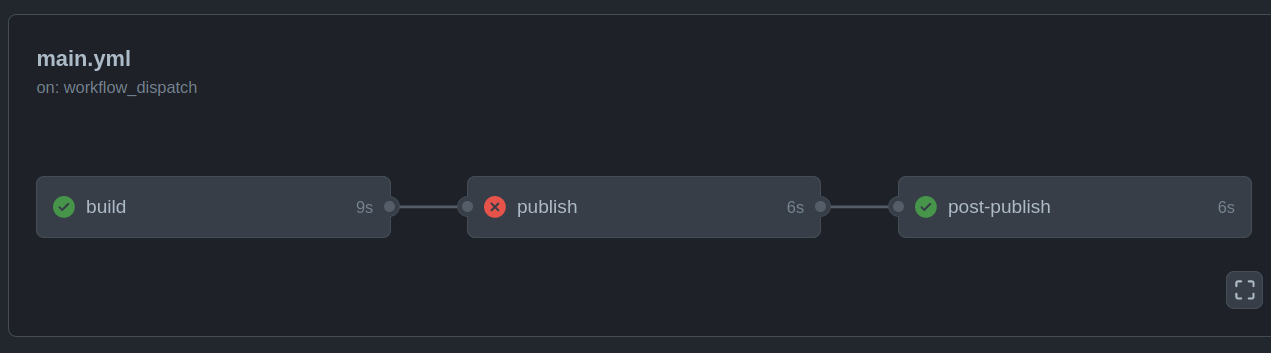
You may figure out if you read carefully these 15 steps are separated into 3 jobs.
- build (1 to 7)
- publish (8 to 10)
- post-publish (11 to end)
All in all, about Github actions, the possibilities are good, most of the use cases are covered, most of the documentation, examples are good (hence the RTFMs in this post), the sources are there to check if you miss something from the docs.
I liked working with it and I really like the result. Now I just push an .md file and I see it on my blog in few seconds, all repos updated nicely.
Next stop is creating my own github-action, probably it will be this workflow packaged into one action. You see, this is, as most of them are, just some shell commands after each other, put into a container or npm package.
I am curious what will I think about this sentence after I actually do it. 😄